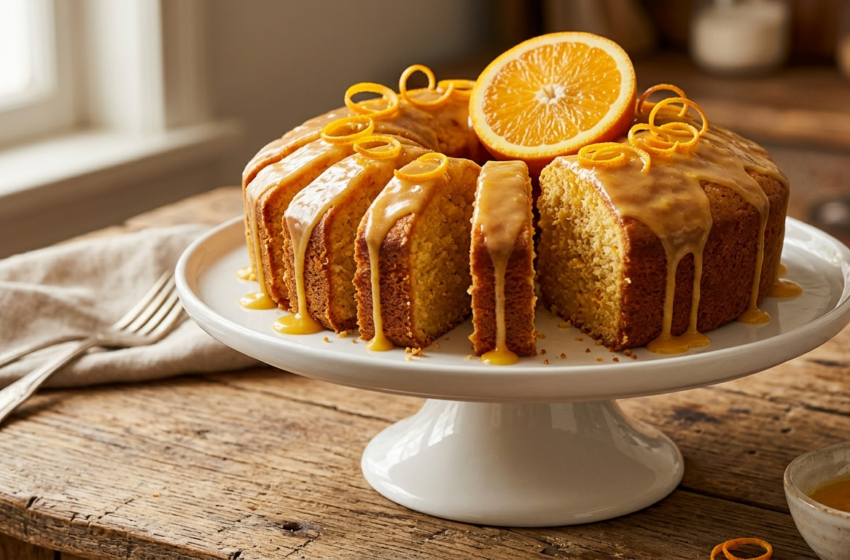
If you’ve been searching for the ultimate orange pound cake recipe, your search ends right here. This is the recipe I’ve tested 20+ times in my own kitchen to get absolutely right tender, buttery, soaked with real citrus flavor, and topped with a glossy orange glaze that shatters into sweet, tangy perfection with every bite. Whether you’re a first-time baker or a seasoned home baker looking for a reliable go-to, this homemade orange pound cake recipe delivers bakery-quality results with everyday ingredients. No special skills required just a love for good cake and fresh oranges.
Table of Contents
Why This Is the Best Orange Pound Cake Recipe You’ll Ever Try
Not all pound cakes are created equal and most orange pound cake recipes floating around the internet are frankly underwhelming. They rely on orange extract instead of real zest, skip the sour cream that makes the crumb genuinely tender, and produce a cake that tastes more like vanilla with a hint of orange candy than the real, vibrant citrus thing. This recipe is different. It uses fresh orange juice and orange zest for honest, bright citrus flavor, a butter-plus-sour-cream base for a moist, velvety crumb, and a thick powdered sugar glaze that doubles down on the orange intensity. Think of it as an old fashioned orange pound cake recipe that’s been thoughtfully elevated all the soul of grandma’s classic, with just enough modern technique to make it truly foolproof.
Ingredients for the Perfect Orange Pound Cake (From Scratch)
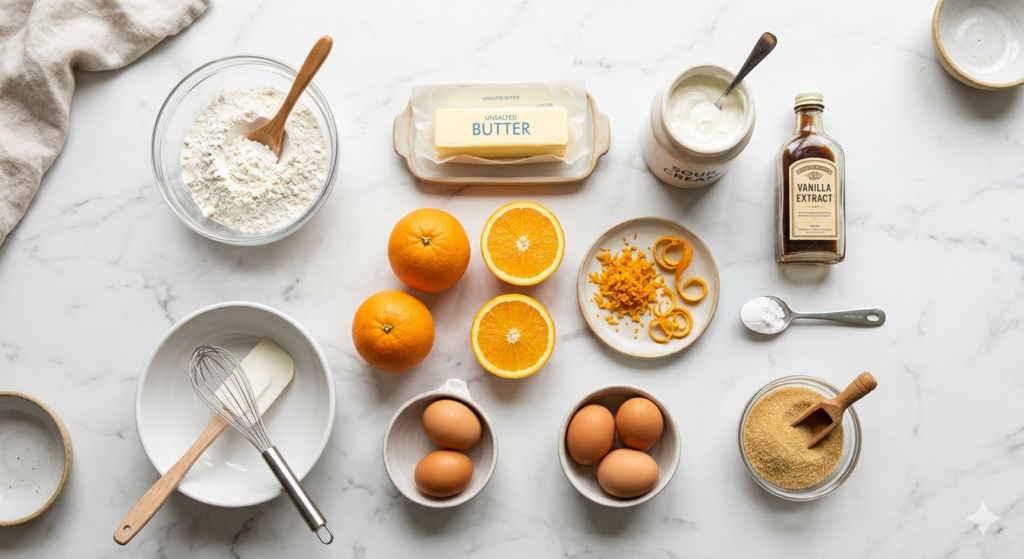
Good baking starts with good ingredients. Here’s everything you’ll need.
For the Cake Batter
| Ingredient | Amount | Notes |
|---|---|---|
| All-purpose flour | 2½ cups (300g) | Spooned and leveled, not packed |
| Unsalted butter | 1 cup (225g) | Room temperature — critical! |
| Granulated sugar | 2 cups (400g) | |
| Large eggs | 4 | Room temperature |
| Fresh orange juice | ¼ cup (60ml) | Freshly squeezed, not bottled |
| Orange zest | 2 tablespoons | From about 2 large navel oranges |
| Sour cream | ½ cup (120g) | Full-fat; see cream cheese variation below |
| Pure vanilla extract | 1 teaspoon | |
| Baking powder | 1 teaspoon | |
| Fine salt | ½ teaspoon |
🍊 Pro Tip: Always use fresh orange juice and orange zest bottled juice lacks the vibrant citrus flavor that makes a homemade orange pound cake recipe truly shine. A single large navel orange typically yields about 3–4 tablespoons of juice and 1 tablespoon of zest.
For the Orange Glaze
| Ingredient | Amount |
|---|---|
| Powdered sugar (sifted) | 1½ cups (180g) |
| Fresh orange juice | 3–4 tablespoons |
| Orange zest | 1 teaspoon |
This three-ingredient orange glaze is arguably the best glaze for orange pound cake it sets to a beautiful, slightly firm finish and packs a concentrated citrus punch that perfectly complements the buttery cake beneath it.
Equipment You’ll Need
You don’t need a professional kitchen — just a few reliable tools:
- Stand mixer or hand mixer — for properly creaming butter and sugar
- 10–12 cup Bundt pan OR 9×5 inch loaf pan — see the comparison section below
- Zester/microplane — essential for getting fine, aromatic orange zest without the bitter white pith
- Citrus juicer — manual or electric, to extract clean juice efficiently
- Mixing bowls (at least two sizes)
- Rubber spatula — for scraping down the bowl and folding gently
- Cooling rack — don’t skip this; it prevents a soggy bottom
Baker’s Note: This recipe works beautifully as both an orange bundt cake recipe and a classic loaf cake. Choose your pan based on how you want to serve it the bundt pan makes a stunning centerpiece while the loaf pan is simpler for everyday slicing.
Easy Orange Pound Cake Recipe — Step-by-Step Instructions
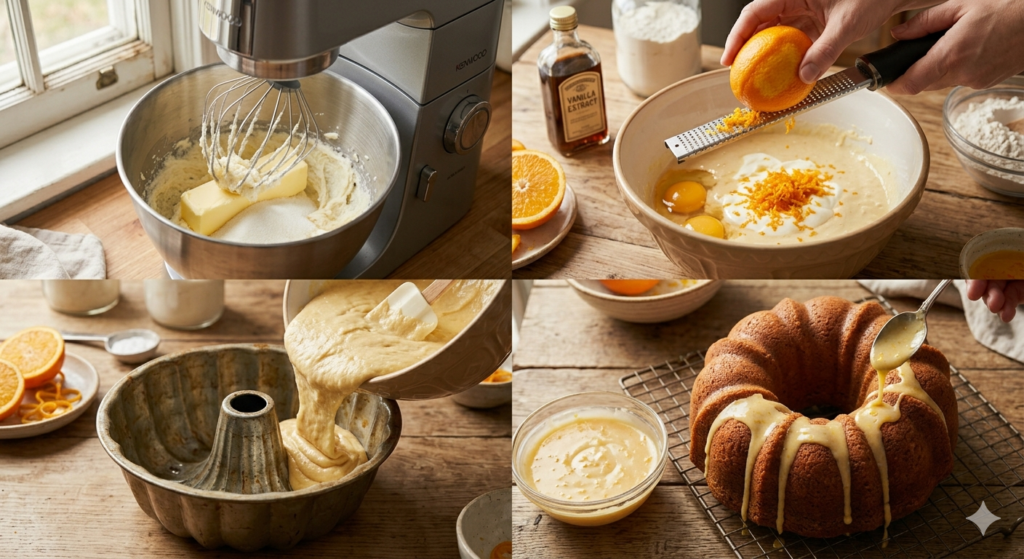
Let’s bake. Follow these steps in order, and don’t rush pound cake rewards a little patience.
Step 1 — Prepare Your Pan and Preheat the Oven
Preheat your oven to 325°F (165°C). Thoroughly grease your bundt pan or loaf pan with softened butter, then dust with flour, tapping out the excess. A well-prepared pan is the difference between a cake that releases cleanly and one that tears on the way out don’t shortcut this step. If using a loaf pan, you can alternatively line it with parchment paper with an overhang on both sides for easy lifting.
Step 2 — Cream Butter and Sugar Until Fluffy
In your stand mixer (or a large bowl with a hand mixer), beat the room-temperature butter and granulated sugar together on medium-high speed for 4–5 full minutes, until the mixture is pale, noticeably fluffy, and nearly doubled in volume. This step is the backbone of the entire cake the prolonged creaming whips air into the fat, which creates the lift and tenderness that defines a great pound cake. Don’t rush it.
Step 3 — Add Eggs, Orange Zest, and Vanilla
Add the eggs one at a time, beating for about 30 seconds after each addition before adding the next. This gradual incorporation keeps the emulsion stable and prevents the batter from curdling. After the last egg, add the orange zest and vanilla extract and mix until just combined. At this stage, your kitchen should smell extraordinary.
Step 4 — Mix Dry Ingredients Separately
In a separate bowl, whisk together the all-purpose flour, baking powder, and salt until evenly combined. Whisking the dry ingredients together first ensures the baking powder and salt are evenly distributed throughout the batter, so you get a consistent rise and flavor in every slice.
Step 5 — Combine Wet and Dry with Sour Cream
With the mixer on low, add the flour mixture and sour cream to the butter mixture in alternating additions begin and end with the flour (flour → sour cream → flour → sour cream → flour, three flour additions and two sour cream additions). Mix only until each addition is just incorporated. Overmixing at this stage develops gluten, which toughens the crumb stop as soon as you no longer see dry streaks.
Step 6 — Fold In the Fresh Orange Juice
Add the fresh orange juice and fold it in gently with a rubber spatula using a light hand. The juice adds moisture and a final burst of bright citrus flavor. Because you’re adding liquid after the flour is incorporated, fold don’t beat to keep the batter tender.
Step 7 — Pour Batter and Bake
Scrape the batter into your prepared pan and smooth the top with a spatula. Gently tap the pan on the counter two or three times to release any large air bubbles.
- Bundt pan: Bake at 325°F for 55–65 minutes
- Loaf pan: Bake at 325°F for 60–70 minutes
The cake is done when a wooden skewer inserted into the center comes out with just a few moist crumbs (not wet batter), and the top is deep golden brown. Tent loosely with foil in the last 10–15 minutes if the top is browning too quickly.
Step 8 — Make the Orange Powdered Sugar Glaze
While the cake cools, whisk together the sifted powdered sugar, fresh orange juice, and orange zest in a small bowl until smooth and pourable. Start with 3 tablespoons of juice and add more, a teaspoon at a time, until you reach a thick but drizzlable consistency it should coat the back of a spoon and fall in a slow, steady ribbon.
Step 9 — Glaze and Garnish
Allow the cake to cool in the pan for 15 minutes, then turn it out onto a cooling rack and cool completely at least 1 hour. Glazing a warm cake causes the glaze to melt and absorb rather than set on the surface. Once fully cooled, spoon the orange glaze over the top, letting it cascade naturally down the sides. Finish with a sprinkle of fresh orange zest for color and a final hit of citrus aroma.
The Secret to a Moist Orange Pound Cake (Don’t Skip This!)
A dry pound cake is a heartbreak and unfortunately, it’s one of the most common complaints I hear. Here’s the truth about what keeps a pound cake tender and moist, and why every single one of these factors matters.
Sour cream is non-negotiable. The fat in sour cream coats the flour proteins before they can form strong gluten networks, resulting in a more tender, moist crumb. It also adds a subtle tanginess that balances the sweetness and enhances the orange flavor. Don’t swap it for plain yogurt unless it’s full-fat Greek yogurt the lower fat content changes the texture noticeably.
Butter temperature matters more than you think. Your butter must be genuinely room temperature not melted, not cold, not “close enough.” When you press it with a finger, it should hold an indent but not feel greasy. Cold butter won’t cream properly, and melted butter changes the structure entirely. Pull it from the refrigerator 1–2 hours before baking.
Room-temperature eggs prevent curdling. Cold eggs added to warm, creamed butter cause the emulsion to break, which leads to a dense, sometimes gummy crumb. Letting your eggs sit at room temperature for 30–60 minutes is one of the simplest, most impactful steps you can take.
Don’t overbake. Pound cake continues cooking as it rests in the hot pan after you remove it from the oven. Pull it the moment the skewer comes out with just a few moist crumbs. An extra 10 minutes in the oven can mean the difference between moist and dry.
Let it rest before cutting. I know it’s hard to wait, but cutting into a pound cake while it’s warm compresses the crumb and allows moisture to escape as steam. Give it a full hour on the rack it’s worth every minute.
Baker’s Note: Many readers ask us, “Why is my pound cake dry?” Nine times out of ten it comes down to one (or more) of these five factors. Getting them right is the single biggest upgrade you can make to your baking.
Can I Use Bottled Orange Juice Instead of Fresh?
Yes you can. I want to be honest with you here rather than give you the kind of answer that pretends perfection is the only option. If fresh oranges aren’t available or you’re in a pinch, bottled orange juice will work in this recipe. The cake will still bake up properly and taste pleasant.
That said, there is a noticeable flavor difference. Fresh orange juice contains volatile aromatic compounds that begin breaking down almost immediately after squeezing. Bottled juice even high-quality, not-from-concentrate varieties has been pasteurized and processed, which mutes those delicate top notes. The result is a cake that tastes “orange-ish” rather than vibrantly, unmistakably orange.
If you do use bottled juice: increase the orange zest to 3 full tablespoons to compensate for the lost aromatic complexity. The zest contains the essential oils in the orange peel, which carry the most intense citrus flavor and don’t degrade the way juice does. This simple adjustment brings a great deal of the brightness back.
For the glaze, fresh juice makes a more meaningful difference than it does in the batter even just half a fresh orange squeezed directly into the glaze will give you noticeably better flavor. If you have even one fresh orange available, save it for the glaze.
Orange Pound Cake in a Bundt Pan vs Loaf Pan Which Is Better?
Both work beautifully, and the right choice comes down to your purpose.
Bundt Pan Best for presentation and even baking
A bundt pan is the classic choice for an orange pound cake recipe, and for good reason. The central tube allows heat to penetrate from the inside and outside simultaneously, which means the cake bakes more evenly and you’re less likely to end up with a dense, underbaked center. The decorative ridges also give the orange glaze gorgeous channels to run through, creating a bakery-worthy finish with almost no effort.
- Pan size: 10–12 cup capacity
- Bake time: 55–65 minutes at 325°F
- Best for: Dinner parties, gifting, special occasions, or any time you want the cake to look impressive
Loaf Pan Best for beginners and everyday baking
A standard loaf pan is simpler, easier to release, and produces a cake that’s straightforward to slice into neat, even pieces. It’s the better choice if you’re new to pound cake or want a no-fuss everyday option.
- Pan size: 9×5 inch loaf pan
- Bake time: 60–70 minutes at 325°F (the narrower shape means slightly longer baking)
- Best for: Weekday baking, breakfast slices, lunchboxes, or freezing individual portions
Pro Tip: Regardless of which pan you use, always check for doneness with a skewer rather than relying purely on the timer. Ovens vary, and the skewer test is the single most reliable indicator that your pound cake is done.
How to Store Orange Pound Cake (Keep It Fresh for Days!
One of the great virtues of pound cake is how well it keeps. The high fat content from the butter and sour cream acts as a natural preservative, keeping the crumb moist longer than lighter cakes.
Room Temperature (up to 3 days) Wrap the cooled, glazed cake tightly in plastic wrap or store in an airtight cake container. Keep it at room temperature, away from direct sunlight or heat. The glaze may soften slightly in humid conditions but won’t affect the flavor.
Refrigerator (up to 1 week) Wrap tightly in plastic wrap and refrigerate. Let refrigerated slices come to room temperature for 20–30 minutes before serving cold pound cake is noticeably denser, and a few minutes at room temperature restores the soft, tender texture.
Freezer (up to 3 months) Pound cake freezes exceptionally well. For best results, freeze before glazing — wrap the completely cooled, unglazed cake tightly in two layers of plastic wrap, then a layer of foil. Label with the date. To serve, thaw overnight in the refrigerator or for 2–3 hours at room temperature, then make and apply a fresh glaze.
If you want to freeze individual slices, place them on a parchment-lined baking sheet and freeze until solid (about 2 hours), then transfer to a zip-top freezer bag. Individual slices thaw in under an hour at room temperature.
Tips for Bakery-Style Results Every Time
These are the habits that separate a good pound cake from a truly great one:
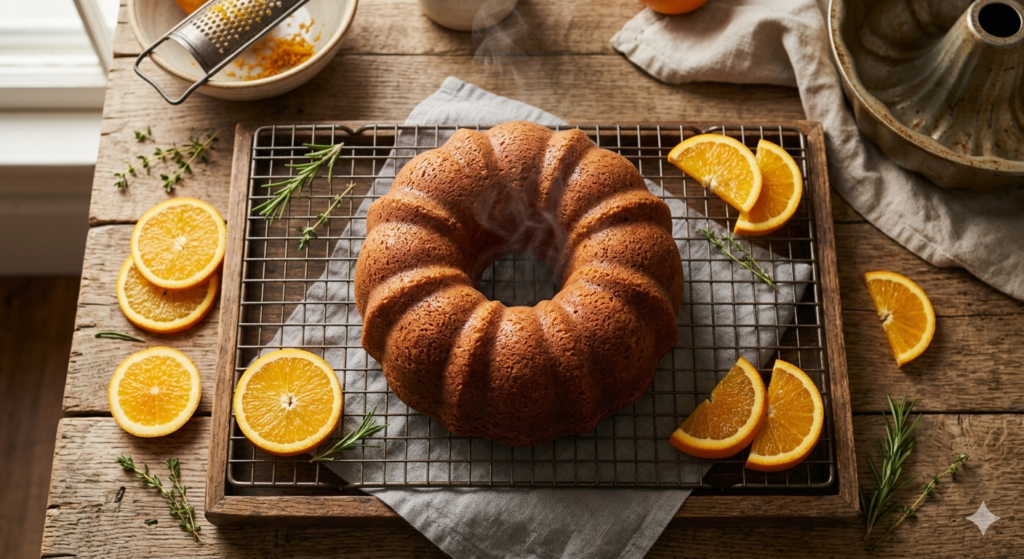
- Use truly room-temperature ingredients. Butter, eggs, and sour cream should all be at room temperature (65–70°F). This is the single most impactful preparation step for a tender, even crumb.
- Don’t skip the 4–5 minute creaming step. Under-creaming means less air incorporated, which means less lift and a denser finished cake. Use a timer and let the mixer run.
- Stop mixing the moment the flour disappears. Once you add flour, overmixing develops gluten and makes the cake tough. Low speed, short time, and a final fold with a rubber spatula is all you need.
- Use a skewer, not just the timer. Oven temperatures vary by 25–50°F even among “accurate” ovens. Start checking 10 minutes before the minimum bake time, and pull the cake when the skewer comes out with just a few moist crumbs.
- Cool completely before glazing. This cannot be overstated. A warm cake will absorb the glaze rather than let it set on the surface, and you’ll end up with a sticky, uneven finish instead of that gorgeous glossy drizzle.
- Use a microplane for zesting. A microplane gives you fine, feathery zest that distributes evenly through the batter and glaze without any bitter white pith. A box grater’s fine side works in a pinch but produces coarser zest.
- Measure flour correctly. Spoon the flour into your measuring cup and level it off never scoop directly from the bag. Over-measuring flour is one of the leading causes of dry, dense pound cake.
Frequently Asked Questions About Orange Pound Cake
How do I make orange pound cake from scratch without a mixer?
You can make this recipe by hand using a wooden spoon or silicone spatula, though it takes more effort. The key step is creaming the butter and sugar use very soft (almost too-soft) butter and beat vigorously for at least 6–8 minutes by hand until pale and fluffy. A wooden spoon works better than a whisk here because you want to push and fold the butter rather than whip air into it. The rest of the steps (whisking dry ingredients, alternating additions) are easily done by hand.
Why did my pound cake sink in the middle?
Sinking in the middle is usually caused by one of three things: underbaking (the structure hasn’t fully set before the cake starts to cool), too much leavening (which creates a rise the structure can’t support), or opening the oven door too early during baking. Always check for doneness with a skewer before removing the cake, keep your baking powder amount precise, and resist opening the oven door before the minimum bake time.
What is the best glaze for orange pound cake?
A simple three-ingredient orange glaze made from sifted powdered sugar, fresh orange juice, and orange zest is, in my tested opinion, the best glaze for orange pound cake. It’s easy, sets to a slightly firm finish, and packs genuine citrus intensity. For a richer glaze, you can add a teaspoon of melted butter to create a glaze that pours more smoothly and sets with a slight sheen.
Can I make this as a mini orange pound cake recipe?
Absolutely. Divide the batter evenly among a greased mini loaf pan tin (makes about 4–6 mini loaves) or a standard muffin tin (makes about 18 muffins). Reduce the bake time significantly mini loaves typically take 28–35 minutes at 325°F, and muffin-sized portions take 20–25 minutes. Start checking earlier than you think necessary and use the skewer test. Mini versions make wonderful gifts and freeze just as well as a full cake.
How do I get more orange flavor in my pound cake?
Three reliable ways: (1) Increase the orange zest this is the most impactful change you can make, as the zest contains the essential oils that carry the most concentrated citrus flavor. Go up to 3 tablespoons. (2) Add a tablespoon of freshly squeezed orange juice to the glaze instead of relying entirely on powdered juice the extra hit on top amplifies the overall citrus impression. (3) Brush the warm cake with an orange simple syrup (equal parts sugar and orange juice, heated until dissolved) as it comes out of the pan. This technique, common in professional pastry kitchens, saturates the crumb with extra moisture and flavor before the glaze goes on.
Ready to Bake?
This orange pound cake recipe is the kind of bake that rewards you every single time it’s simple enough for a Tuesday afternoon and beautiful enough for a Sunday celebration. I genuinely hope it becomes a permanent fixture in your recipe rotation the way it has in mine.
If you bake it, I’d love to know how it turned out. Did you go with the bundt or the loaf pan? Sour cream or cream cheese? Drop your experience in the comments the baking community here is always curious and always welcoming.
Hungry for more homemade recipes made with love? Head back to our Head back to our Homepage for fresh baking ideas for fresh baking ideas, seasonal recipes, and everything you need to feel confident in the kitchen — one recipe at a time.

Hi, I’m Jamie! I’m a home cook turned recipe developer with a deep love for honest, approachable food. After years of experimenting in my own kitchen — and feeding anyone who’d sit still long enough — I started My Recipes Collections to share the dishes that have become staples at my table.
My recipes focus on bold flavors, simple techniques, and ingredients you can actually find at your local grocery store. Whether you’re a weeknight warrior or a weekend baker, there’s something here for you.